![]()
![]()
![]()
![]()
|
|
|
|
|
The module configuration panel can be brought up by activating the corresponding button  available on the bottom status line.
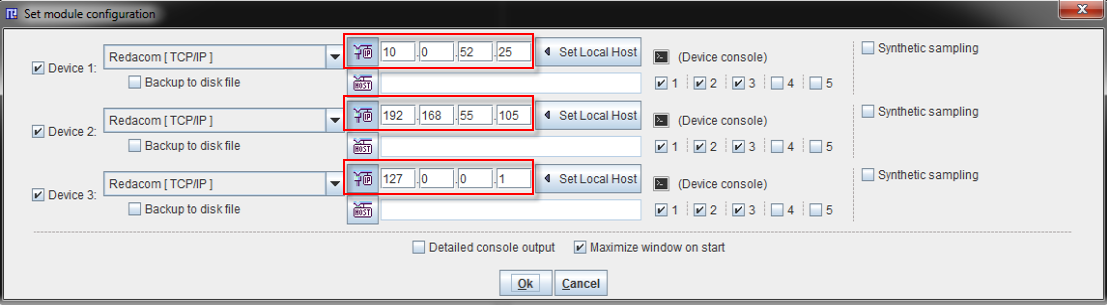
The module configuration interface is organized as shown below:
1. The area for the device(s) configuration: allows the simultaneous configuration of up to a maximum of three devices. The devices can be simultaneously used during the acquisition. Each device is characterized by an IP that can be enter manually or activating the Set Local Host button. Alternatively, the device can be set up within a network specifying the "host" address in the host field  .
.
The set up can be tested activating the Device console icon  . A dialog window is open and the connection can be verified selecting the dedicated button
  . If the connection succeeds, the connection button is disabled and the fields dedicated to the port definition, user name and password are set and become gray. Accordingly, the console returns a successful message as shown below:
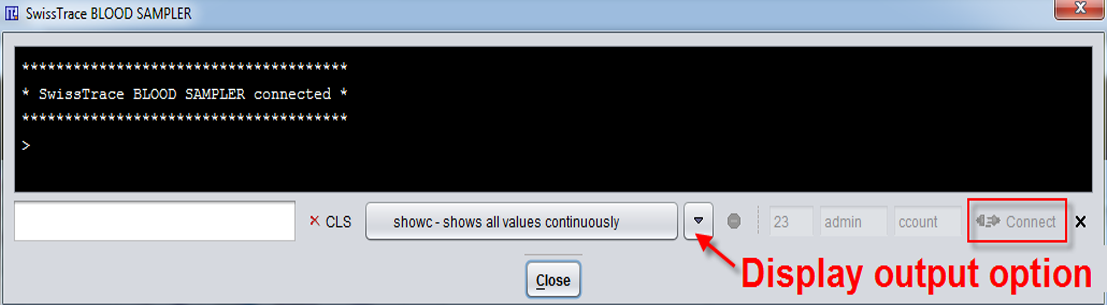
The Display type selection allows choosing the way measurements are shown on the console.
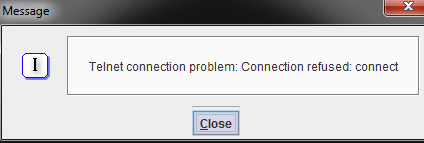
In case the connection cannot be established a failure message is displayed in a dialog window:
.
Finally, the Device console dialog window can be closed with the Close button.
A number of 5 channels are available for each device. The first three are dedicated to the coincidences (number 1) and to the singles corresponding to each LYSO crystals (number 2 and 3). Furthermore, the analog channels 4 and 5 can be recorded simultaneously for monitoring signals from additional instruments. During the acquisition, the measured data can be automatically saved. This can be easily achieved enabling the Backup to disk file checkbox.. The aim of this checkbox is to avoid data lost during the experiment, in case an unexpected event occurs. For each channel a text file with the date, time and the measurements information is saved. These files obtain a .crv suffix and can easily be opened in Excel or a text editor. The files backup location, by defaults, is in the PMOD3.3 installation path: Pmod3.3/data/swisstrace and are encoded as follows: D_1_C_<n>_<date_time>.crv, where "n" corresponds to the channel number.
2. The synthetic sampling pane.
3. Two optional settings on the bottom area: the first consents detailed console output during the acquisition while the other one allows the window maximization upon starting. If the Detailed console output checkbox is enabled, the sampling data are displayed in the console.
The presence of the yellow triangles on the configuration dialog window informs that the acquisition display is slow down because of the selected settings.
The selection of the Ok button closes the configuration dialog window. Subsequently, a dialog confirmation window pops up.
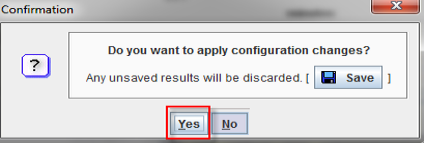
Finally, the activation of the Yes button save the settings and acquisition can be started.