![]()
![]()
![]()
![]()
|
|
|
|
|
The Segmentation tool is a method for simple mask creation similar to the segmentation in the 3D tool. It opens the following dialog window.
The following segmentation methods available.
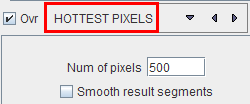
HOTTEST |
The HOTTEST PIXELS segmentation allows to get a 3D object of the (potentially disconnected) pixels with the highest values. The number of included pixels can be specified in the Num of pixels field.
|
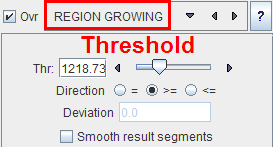
REGION |
Region growing is a method by which the user defines a starting point (seed) within the object of interest, and the algorithm tries to find all connected pixels which fulfill a certain criterion. After selecting REGION GROWING the following control elements appear.
The slider and the number field serve for defining the pixel value. Together with the Direction radio button the criterion for pixel inclusion is formed.
A preview of the result is shown in the Input display if the Ovr (Overlay) box is checked, for example after clicking into a hot spot. To start the segmentation, navigate to a slice (in any direction) which shows the tissue of interest and click with the left mouse button onto a central point. Then adjust the criterion until the overlay indicates a promising segmentation. |
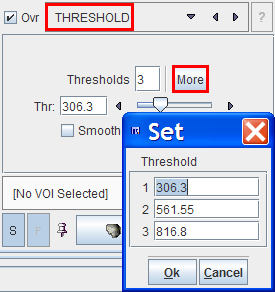
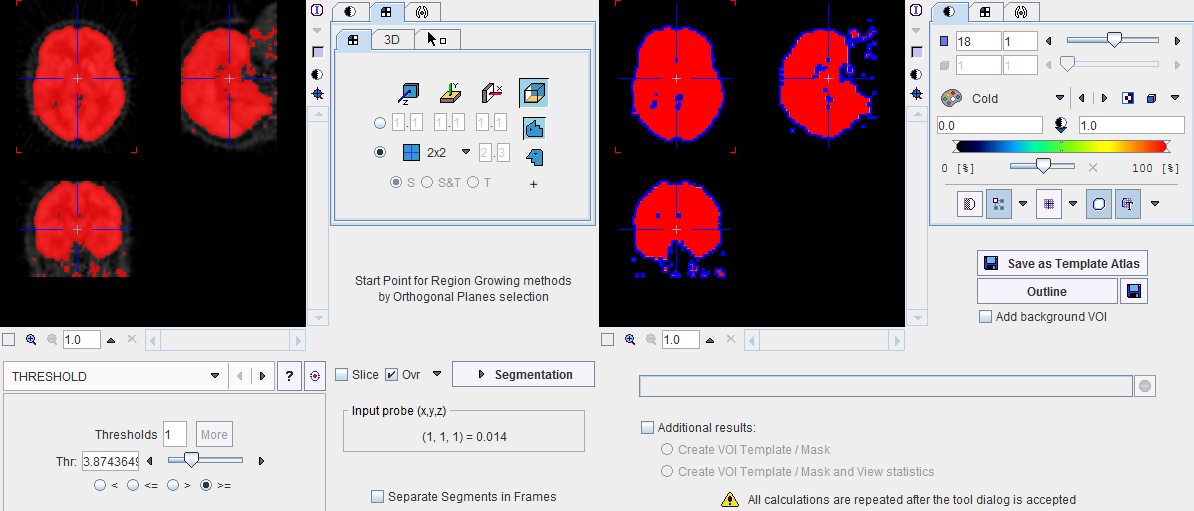
THRESHOLD |
The THRESHOLD segmentation is conceptually simple. All pixels above the threshold are included in the segment. Sometimes it is helpful to segment at several threshold levels at once. This can easily be realized by setting the number in the Thresholds field accordingly, select More, and enter the threshold values in the appearing Set dialog. In the example below, three segments of decreasing volume will be generated at thresholds 306.3, 561.55 and 816.8. During visualization, the user can show or hide each of the segments separately.
|
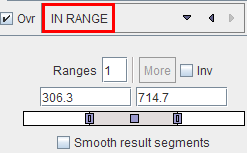
IN RANGE |
The IN RANGE segmentation is similar to the THRESHOLD method, except that an upper limit is also defined. This can be helpful to find objects with intermediate intensities. The complementary pixels which are outside the specified range can be obtained by checking the Inv box. Similar to the THRESHOLD segmentation, multiple Ranges can be defined and segmented at once
|
Otsu Threshold (ITK) |
"Another criterion for classifying pixels is to minimize the error of misclassification. The goal is to find a threshold that classifies the image into two clusters such that we minimize the area under the histogram for one cluster that lies on the other cluster’s side of the threshold. This is equivalent to minimizing the within class variance or equivalently maximizing the between class variance." The ITK Software Guide.
With the mouse CT, Otsu with the settings above finds appropriate thresholds for the skeleton object and the soft tissue, as illustrated below.
|
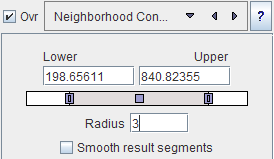
Neighborhood Connected (ITK) |
Neighborhood Connected is a region growing method with two criteria:
By the combination of these criteria small structures are less likely to be accepted in the region.
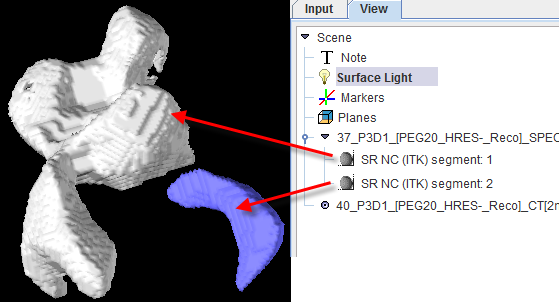
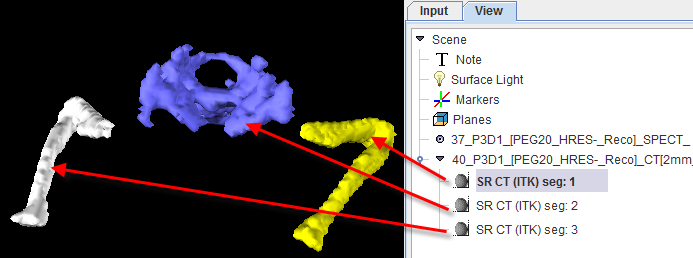
Multiple seed points can be specified by the use of markers.
and correspondingly multiple structures can be found at once.
|
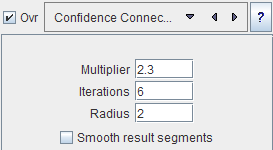
Confidence Connected (ITK) |
"The criterion used by the Confidence Connected method is based on simple statistics of the current region. First, the algorithm computes the mean and standard deviation of intensity values for all the pixels currently included in the region. A user-provided factor is used to multiply the standard deviation and define a range around the mean. Neighbor pixels whose intensity values fall inside the range are accepted and included in the region. When no more neighbor pixels are found that satisfy the criterion, the algorithm is considered to have finished its first iteration. At that point, the mean and standard deviation of the intensity levels are recomputed using all the pixels currently included in the region. This mean and standard deviation defines a new intensity range that is used to visit current region neighbors and evaluate whether their intensity falls inside the range. This iterative process is repeated until no more pixels are added or the maximum number of iterations is reached." The number of iterations is specified based on the homogeneity of the intensities of the anatomical structure to be segmented. Highly homogeneous regions may only require a couple of iterations. Regions with ramp effects, like MRI images with inhomogeneous fields, may require more iterations. In practice, it seems to be more important to carefully select the multiplier factor than the number of iterations. However, keep in mind that there is no reason to assume that this algorithm should converge to a stable region. It is possible that by letting the algorithm run for more iterations the region will end up engulfing the entire image. The initialization of the algorithm requires the user to provide a seed point. It is convenient to select this point to be placed in a typical region of the anatomical structure to be segmented. A small neighborhood around the seed point will be used to compute the initial mean and standard deviation for the inclusion criterion."
|
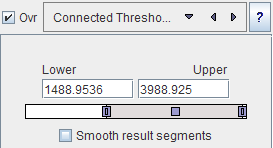
Connected |
Connected Threshold is a region growing method with the criterion that (similar to the IN RANGE method) the included pixels must have values between a Lower and and Upper threshold.
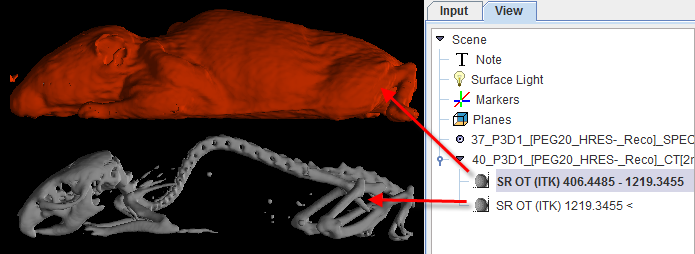
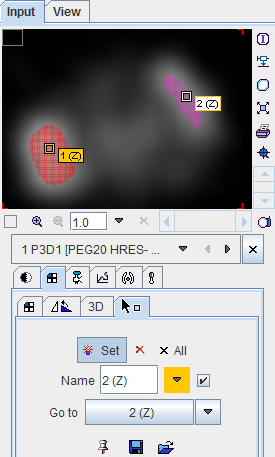
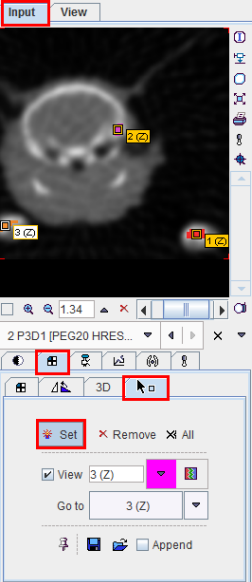
As usual with region growing methods, the user has to specify a seed point by clicking into the image. The ITK region growing methods are particular in that multiple seed points can be specified at once by the use of markers as illustrated below.
Once the markers tab has been activated and the Set button enabled, a marker is created as a seed point for each clicking into the image. When the segmentation is started, the region growing with the specified value range is performed from each marker.
|
After specification of the segmentation method and its parameters, the segmentation can be started with the Segmentation button. The result is shown in the right image display port. Note that if the study is dynamic, an additional box All Frames appears. If it is checked, segmentation will be performed for all frames separately, otherwise with the frame which is currently shown.
The segmentation result can be used in different ways:
Save as Template Atlas directly saves the segmented series in an atlas format in the directory Pmod3.3/resources/templates/voitemplates. Subsequently, it can be used for statistics using the Atlas tab of the Templates pane in the VOI definition function.
The Outline button allows creating automatically VOIs for each generated segment. Optionally, the background can be added as a VOI by turning on the Add background VOI checkbox. The outlined VOIs can be saved as files and used for statistics activating the Save icon next to the Outline button.
With the Ok button the segmentation is performed again an the resulting segment returned as an image series which is binary for a simple segmentation and an object map in the case of a clustering method. The following Additional results can be returned.