![]()
![]()
![]()
![]()
|
|
|
|
|
Sometimes it will be helpful to zoom the shown images, for instance during VOI outlining. Image zooming can be operated in different ways
Scrollbar Zooming
Often images ports have a scrollbar area around them. Then the zoom buttons can be used for zooming/shrinking, or a zooming factor can directly be entered.  resets zooming. If the scrollbar is not visible, it can be shown by the indicated button to the image right.
If there is no such button, the image context menu (click right mouse button in image area) can be used instead.
The visible part of the image can be adjusted using the scrollbars around the image which appear as soon as the full image is not visible any more.
Mouse-driven Zooming
There is also a mode for mouse-driving zooming which can be entered by the  button from the image border or the context menu.
When the cursor is moved over the image, it changes its shape:

After appropriate zooming, the zoom mode should be quit by pressing  once more, because some of other mouse-operated functions might not work.
Zooming with Mouse-Wheel
Similar to the zooming mode in other programs PMOD supports zooming with the mouse wheel while holding down the CTRL key. Note that in the orthogonal mode the triangulation point will be kept within the visible area.
Reports of the current configuration in a single image display can always be generated using the report button  next to the image. In more complex configurations such as image fusion (PFUS) or image comparison (PVIEW) a dedicated report button is available which creates a composite report.
The report button opens a dialog window consisting of a header part, the image area, a comment field, and control buttons for adding annotations, saving and printing.
The logo and the institution address of the header can be configured using the  button in the PMOD ToolBox. The patient demographic information is extracted from the image header. It can only be changed by changing the image information itself with the Edit Patient/Study Info function.
The central part contains the image(s) in the layout and color as on the image viewing port(s). As long as the presentation is not fully satisfactory, the user can change it in the application and then activating the button again.

In addition to the provided content the user may add annotations. This can be achieved by enabling the  toggle button in the Annotations area

and then clicking into the report. A dialog window opens for entering a comment title and body.
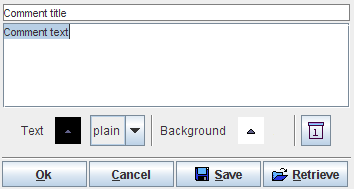
After closing with Ok, the comment text is shown together with a circular marker, connected by a line.

Both the text and the marker can be dragged around so as to properly label a point of interest without obstructing the view on relevant information. By changing the opacity and font size in the Annotations area, the comment appearance can be adjusted appropriately. To stop adding annotations, the toggle button must be set to off by clicking it again.
When the report contents is satisfactory, the page can be sent to a printer using the Print button. Alternatively it can be saved in different graphic formats using the Save as option button. Note that there are two resolutions available: 1188x1684 and 594x842. With 1188x1684, the generated graphic files have notable better quality (particularly the text), but are considerably larger in size.
Several saving formats are available in the appearing dialog:
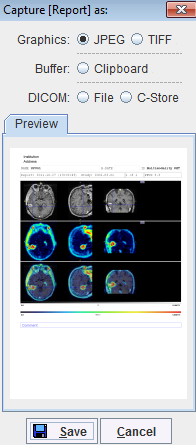
The report page can be saved as a graphic file (JPEG or TIFF) or copied to the Clipboard (for pasting it into a different application). Another alternative is to create a DICOM Secondary Capture object which can be can be saved to disk (DICOM File) or directly sent to a DICOM server (DICOM C-Store).