![]()
![]()
![]()
![]()
|
|
|
|
|
All segmentation operations result in VROs (Virtual Reality Objects) which are arranged as an object tree in the View tab as illustrated in the example below.
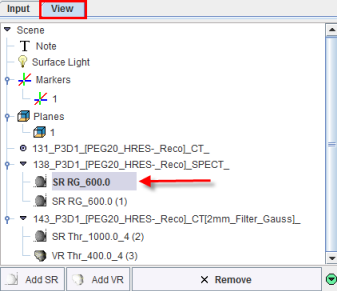
Entries with SR represent surface renderings, VR volume renderings, the Surface Light is the optional lightning source for SR objects, the Markers are synthetic objects usable for indicating points of interest, the Planes are sets of image slices, and Note is a text shown in a corner of the 3D scene. If an object is not needed any more, it can be removed from the tree by the Remove button.
The Add SR and Add VR buttons are used to create ghost objects which are empty SR or VR objects with defined visualization attributes. These attributes will be used for rendering the objects resulting from the next segmentation. The advantage of using ghost objects is avoiding lengthy rendering operations with inadequate default settings.
To delete a 3D object available in the tree initially select the corresponding object and then the Remove button. To Collapse all Scene nodes in the View tree activate the green button  available in the lower right corner. Immediately the color button switch to blue. The details of the View tree can be restore any time activating the blue button
  Expand all Scene nodes.
To modify the appearance of a 3D object, the corresponding object must first be selected in the tree. Its properties are then shown in the lower tab named Surface or Volume etc. according to the object type. If a sub-tree or several objects in the tree are selected, the common properties may be manipulated for all contained objects at once.
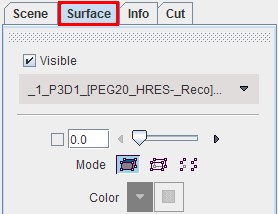
The meaning and use of the properties are explained in the Viewing Options sections below for the different types of objects. There are also sections explaining the function of the other tabs Scene, Info and Cut.